The official tutorial for the installation of Ubuntu can be found here. This tutorial has many parallels to the official tutorial, with a few additions to aspects of the installation that may be particularly difficult.
First we want to download the ISO for Ubuntu 24.04 from the official Ubuntu site.
Next we need to create a bootable flash drive with ISO using an application like rufus or balenaEtcher. I prefer to use rufus but the functionality is virtually the same between each. I would also recommend using a 32GB or larger USB flash drive as the boot device.
Now that we have a live boot USB loaded with Ubuntu, plug the flash drive into a USB port on the device to be loaded with Ubuntu. Usually any USB port will work but on some devices only USB ports mounted on the motherboard work on startup.
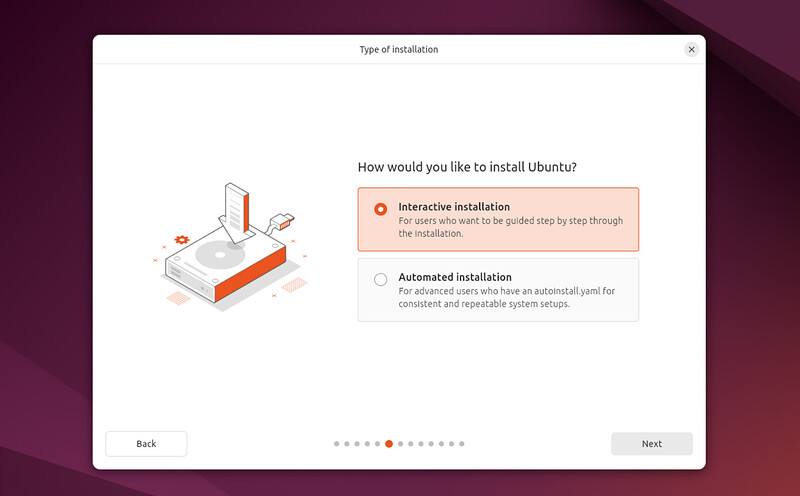
Once the USB is plugged in, start up the PC. The Ubuntu splash screen should show and after a minute or two a “type of installation” window will appear. I usually choose interactive installation as it is easier to use the GUI rather than make changes to a config file like an “autoinstall.yml”.
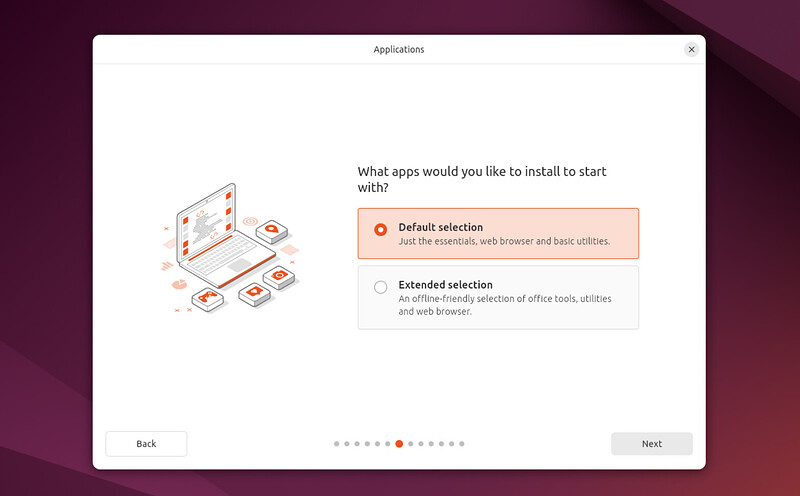
Next a prompt will appear that asks whether you would like to install additional apps or stick with the default selection of apps. I would recommend sticking with the default installation and adding apps as you go. This will ensure that the bare install only includes the necessary software needed to run the operating system.
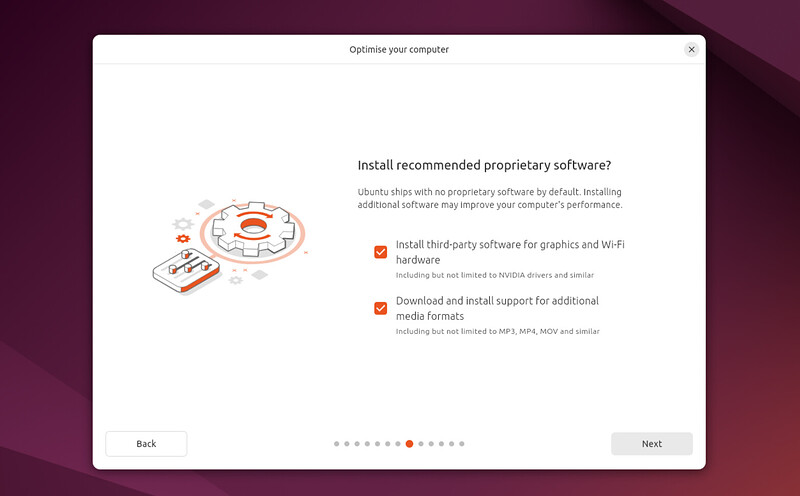
The next prompt is for the install of proprietary, third party drivers and support software. Since drivers can be difficult to procure and diagnosing issues related to missing support functions can be enough to make a person tear their hair out, I recommend checking both boxes.
Now that we have made the necessary modifications to the configuration of the operating system, the next prompt will ask how we want to install Ubuntu onto the system.
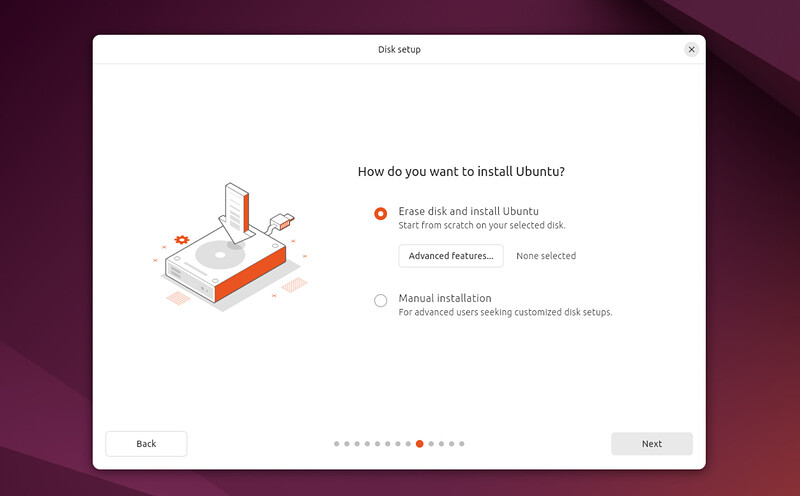
We can either choose to reformat the disk and install the OS, or we can manually install using a customized disk setup. If you are looking to install Ubuntu alongside another OS like windows or MacOS, follow this link for help. If you chose the “erase disk and install Ubuntu” option or you have successfully made a new drive partition to hold Ubuntu, you can either continue to the account creation step or visit the advanced settings prompt to choose security features, more on that here.
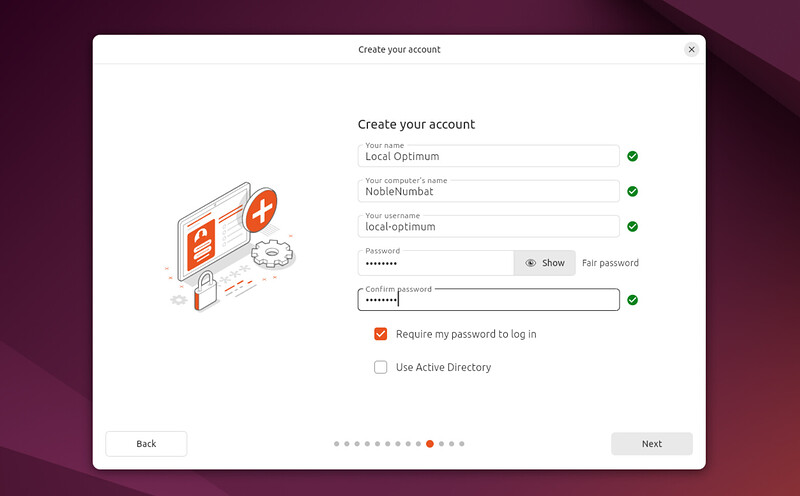
At this stage, a local user account needs to be made. Choose an easy to remember name for the computer as this is what will show up on the local network. The username for the user account is the name that will be used for any actions involving the user, including any work done within the ubuntu terminal.
This prompt is relatively self explanatory, choose your location and timezone for accurate date and time recording, or don’t, it is up to you.

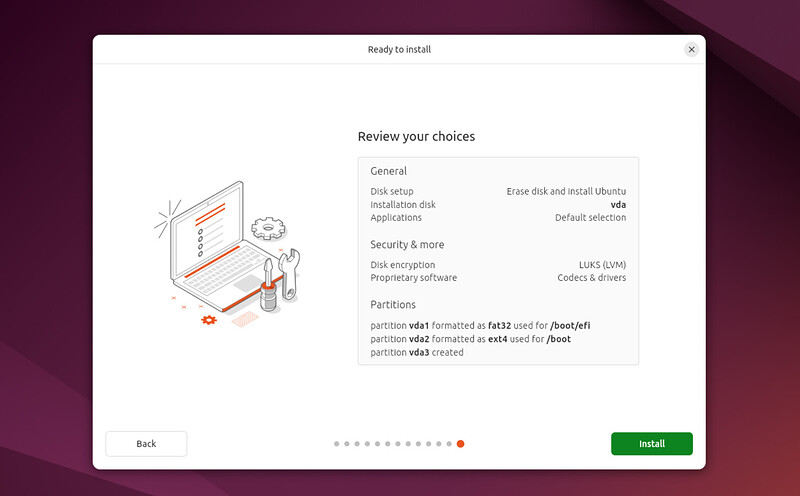
At this juncture, take a minute to review the choices made so far, once confirmed, click the install button in the bottom right corner and wait for the install to complete!
Wait until the “Ubuntu is installed and ready to use” prompt appears, then click restart now. On restart, there will be a message to remove the USB flash drive from the device, do so and press enter to continue. Then log in using the username and password credentials that were input on installation.
Congratulations! You’ve successfully installed a bare bones, but functional Ubuntu distribution. If you were following this guide as a prerequisite to getting started with k3s for the lab, follow this link.